How To Sign Up To Patient Juan
Creating your own Patient Juan™ account is now as easy as 1-2-3.
Step 1: Open Patient Juan
Go to https://www.patientjuan.com/sign-up or click the “Get Started” button on Patient Juan™’s Homepage.
Step 2: Email and Password
Enter Your email address and preferred password in the provided fields. Then, click the “Next” button at the bottom of your screen.
Your email address will immediately be checked to determine if it already exists in the system. Your password, on the other hand, should contain at least six characters.
Avoid using common passwords such as “123456”, “password”, your name, or your birthdate.
Enter your personal information (ie. first name, last name, and birthdate). Then, click the “Next” button at the bottom of your screen.

Step 3: Professional Information
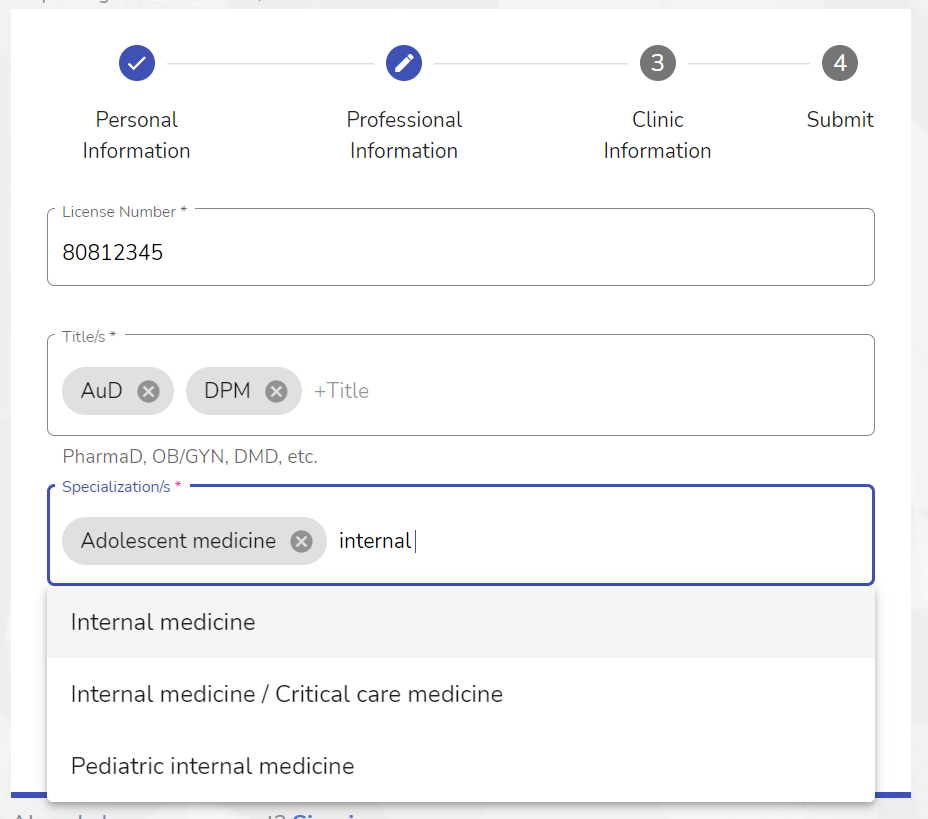
Enter your professional information (ie. license number, titles, and specialties). Then, click the “Next” button at the bottom of your screen.
Patient Juan™ provides suggested titles and specialties that you can choose from. However, you have the freedom to enter any value that you wish by pressing your “Enter” key after typing.
These fields are required to help us customize your experience with Patient Juan™.
Don’t worry! All information provided to Patient Juan™ is secured and cannot be accessed by other people.
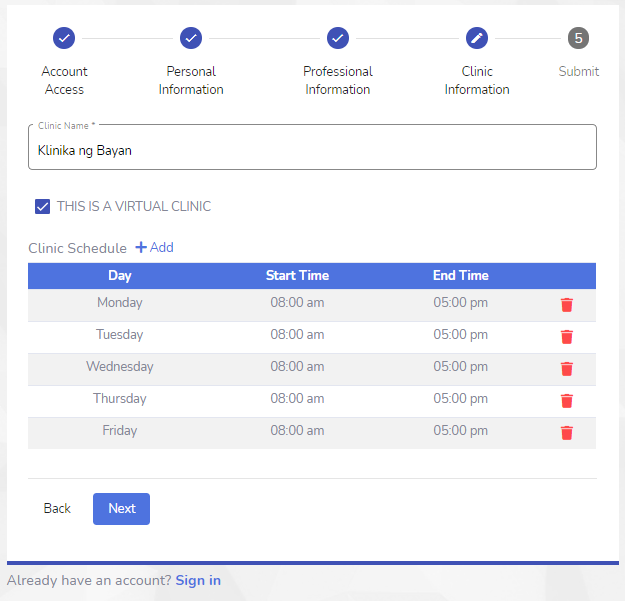
Step 4: Your First Clinic
Create your first clinic! Enter the name and address of your clinic in the fields provided.
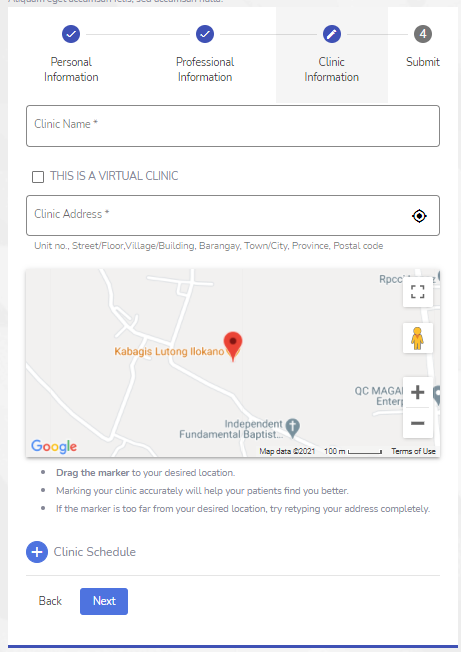
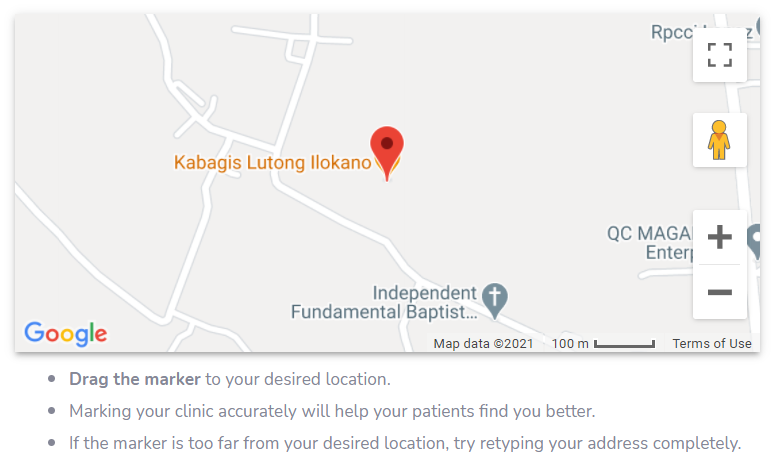
Upon filling out your clinic address, you can pinpoint precisely the location according to Google Maps. Follow the instructions under the map to closely pin the clinic address.
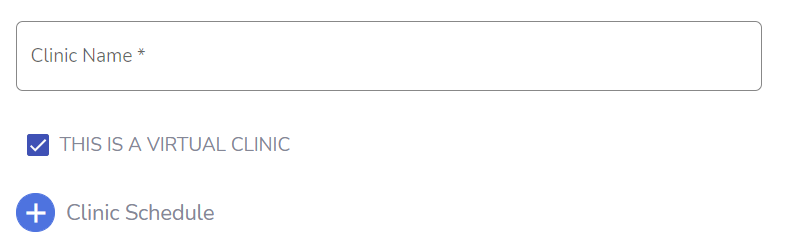
Patient Juan™ gives you the option to tag your clinic as a “Virtual Clinic.”
What is a Virtual Clinic?
A virtual clinic is one that has no physical location for patients to go to.
This option is perfect for doctors who wish to provide online consultations under a completely separate clinic. New doctors who do not have their own physical clinic can also use this option to offer their services to patients.
Step 5: Setup your Clinic Schedule.
Your Clinic Schedule will help you and your patients decide the best time to set up consultations.
It will also help Patient Juan™ guide your patients when creating appointments in the Patient Juan™ Mobile Application.
Clicks the “+Add” button on the Clinic Schedule Section. This will open a window where you can select a specific day of the week when your clinic is open.

After selecting a day, you can now enter your clinic’s opening time and closing time for that day. You also have the option to select “All Day” if your clinic operates from 12:00 AM to 11:59 PM for that day.
Do these steps until you complete your clinic schedule for a whole week. Then, click the “Next” button at the bottom of your screen.
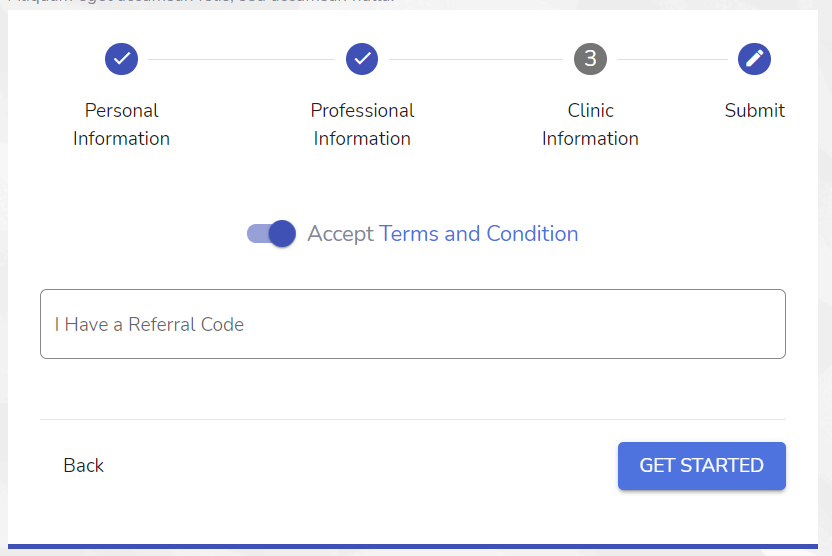
Step 6: Terms And Conditions
Read and agree to Patient Juan™’s terms of service and privacy policy. Finally, click “Get Started.”
After completing the signup process, wait for the verification email sent by Patient Juan™ to the email address you provided.
Clicking “Verify” on the email that you received will activate your account in the system, allowing you to sign in finally.
Welcome to Patient Juan™! Enjoy the dozens of features waiting for you and watch your clinic grow!