Using The History Taking Step In the Consultation Proper
Step 1: Creating History of Present Illness
Upon opening the consultation, it will display the History stages which are: History of Present Illness, Past Medical History, Family Medical History, Social Personal History, and Pediatric History.
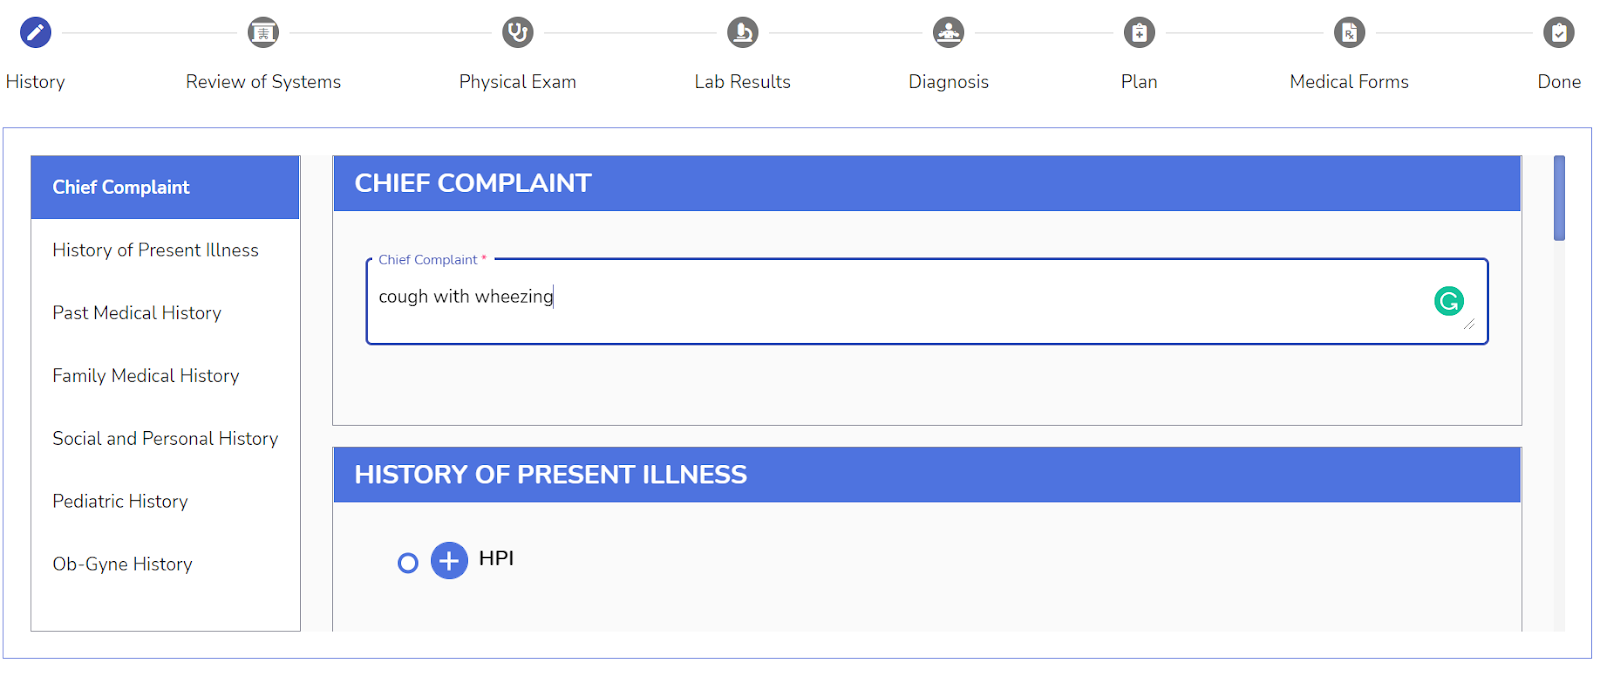
In the History of Present Illness, you can see that the Chief Complaint field is prefilled with the complaint made in the patient booking.
In addition, you can also add and edit the information

You must click the “+” icon and fill out the required fields in the form to attach any HPI information.

A pop up will appear as such.

Leaving it blank will display a warning beneath the field.

Click the “Submit” button to save the information.

You can affix another HPI by clicking the “+” icon again.

Step 2: Past Medical History
Proceeding to the Past Medical History. This category has the following sections: Medical Conditions, Medications, Childhood Diseases, Hospitalizations, Surgeries, Accidents and Injuries, Blood Transfusions, Allergies and Psychiatrics.
All sections of the Past Medical History have the same function of inputting medical information. Let’s use the Medical Conditions section as an example.
Click the header to expand the section. Click the “+” icon to attach a medical condition of the patient.

After clicking, a pop up window will display.

The Condition field can either manually be filled out or select from the suggested options.

After filling out all the required fields, click the “Add Condition” button.

After clicking, you can see the information plotted in their specific columns in the table.

If you want to edit or delete any medical information on the table, click the “Action”icon on the most left column of the table.

The “Action” icon will display a for a dropdown that will show edit and delete functions.

Step 3: Family Medical History
Proceeding to the Family Medical History. Just like the Past Medical History table, you should click the Medical Conditions header to expand and click the “+” icon to attach any family medical condition.

Upon clicking the button, a pop up will display.

The Condition field can either manually be filled out or select from the suggested options.

After filling out all the required fields, click the “Add Condition” button.

After clicking, you can see the information plotted in their specific columns in the table.

If you want to edit or delete any medical information on the table, click the “Action”icon on the most left column of the table.

The “Action” icon will display a for a dropdown that will show edit and delete functions.

Step 4: Social and Personal History
The next part of the History stage is Social and Personal History.
This part of the form is not required but if you desire to put any of the patient’s information, click on the “+” icon to proceed.

Once clicked, a pop up will appear displaying all the necessary information for the Social and Personal History.
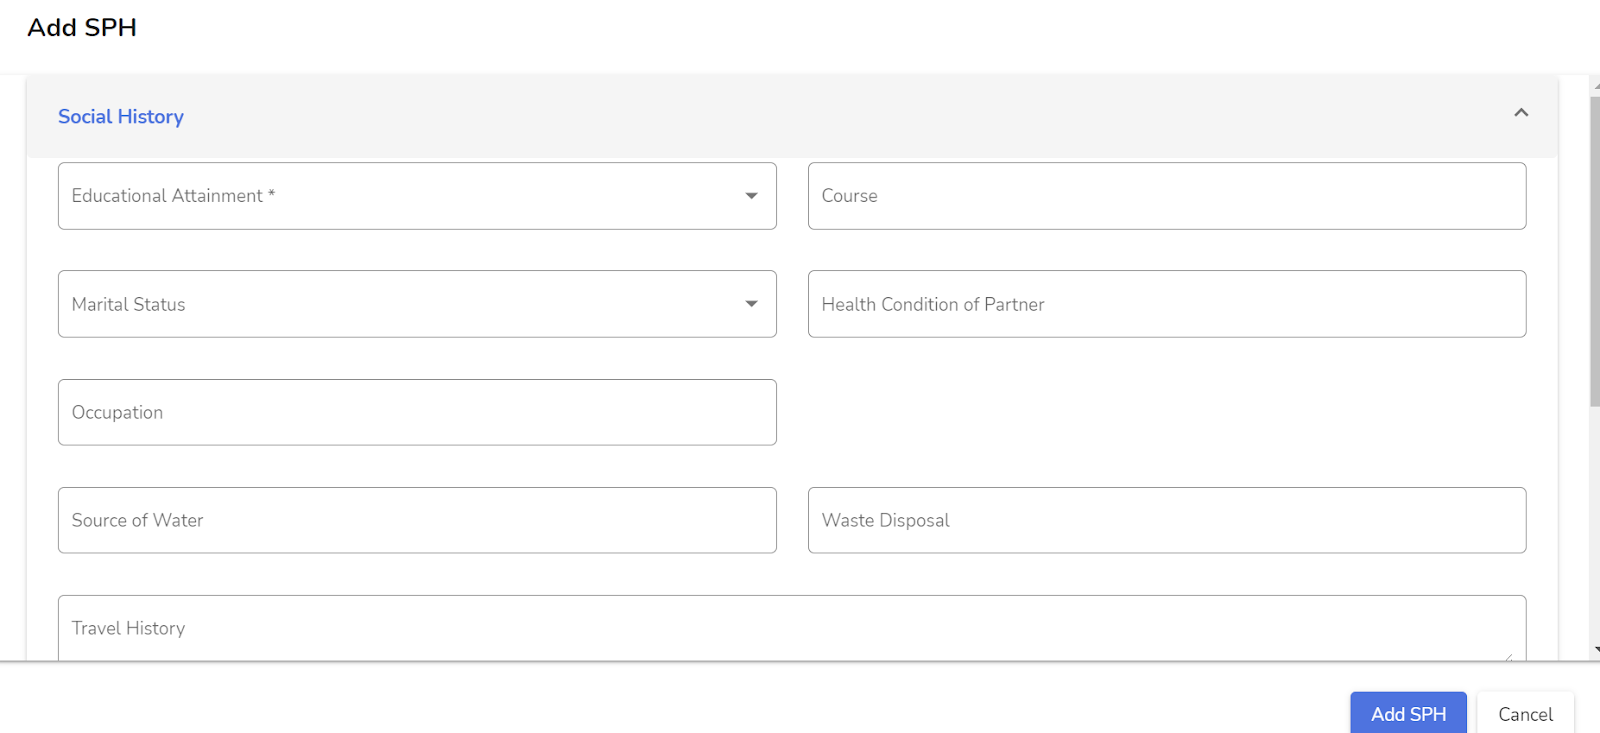
After filling out the desired fields, click the “Add SPH” button to save. Once it is saved, it will appear as such in the form.

If there are any updates in the Social and Personal History, you can “+” icon again to update.

Step 5: Pediatric History
The last part of the History stage is the Pediatric History. This category contains the following sections: Prenatal History, Natal History, Neonatal History, Developmental Milestones, Vaccines, Nutritional Records.

All of the sections of Pediatric History are optional. You can click “+” icon of any of the sections to proceed.

A pop up will appear with their respective fields like other sections.

In the Developmental Milestones section, a table will appear in the pop up window where it shows Age Range and Milestones Categories.

Click on the check box if there are any milestones that are applicable to the patient.

Click on the “Save” button to save the information and the system will automatically close the window and display the saved milestones.

Step 6: Ob-Gyne History
The Ob-Gyne History will display if the patient’s sex is female. The last part has the following sections: Obstetric History, Menstrual History, Present Pregnancy and Pregnancies.

The Obstetric History default is zero. Click on the edit icon on the upper-left side of the section if there are any updates.

A popup will appear as such.

Click on the “Save” button upon updating.

It will automatically close the window and update the Obstetric History table.

In the Menstrual history, click on the “+” icon and a popup will appear displaying the fields as such.

Fill out any of the applicable information of the patient and click on the “Add the Menstrual History” button to save any changes. It automatically appears as such.

The Present Pregnancy refers to the patient who is currently pregnant. If any information is applicable, click on the “+” icon and a pop up window will display the respective fields.

As you can see, the AOG (By LMP), AOG (By UTZ), Estimated Delivery Date from LMP and Estimated Delivery Date from UTZ are disabled and automatically calculated by the system.
You must fill out the necessary information for the latter to compute.

Upon saving, it will display in the section as follows.

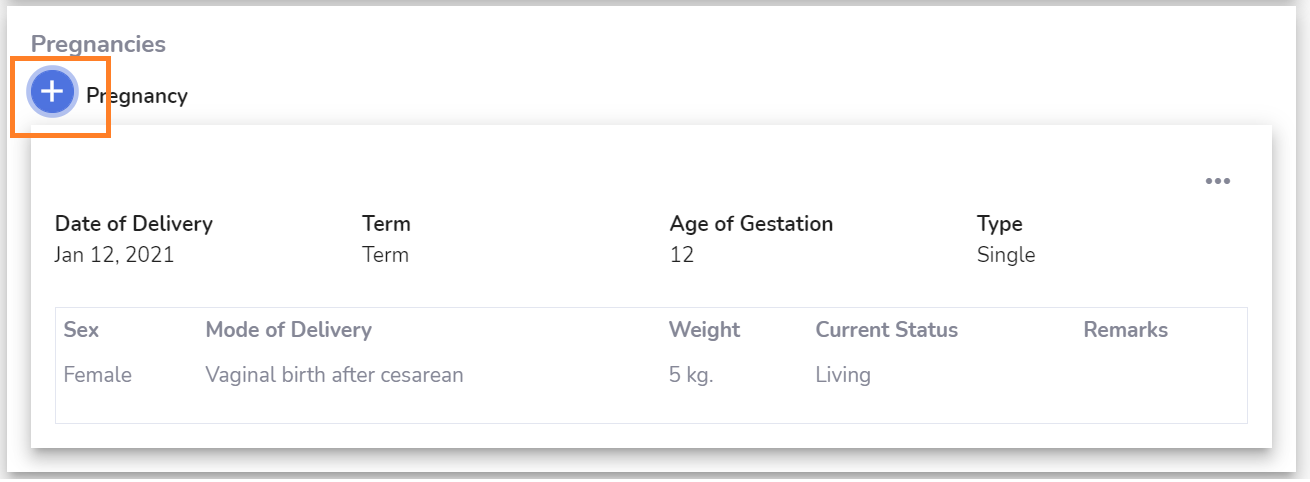
In regards to the Pregnancies section, this refers to the past pregnancies the patient has. To add any pregnancy, you can click the “+” icon and a pop up will display.

The fields will change depending upon the pregnancy type selected.
For single pregnancy type.

For multiple pregnancy type.

For miscarriage pregnancy type.

For ectopic pregnancy type.

For molar pregnancy type.

Regardless of the type, fill out the necessary information and click on the “Add Pregnancy” button to proceed. It will automatically close the windows and display the saved input.

To add another pregnancy, click on the “+” and repeat the process.
To edit or delete any pregnancy, click on the “Settings” button on the upper left corner of the card.

Step 7: Proceed to the Next Stage
After filling out at least the required fields, you can click the “Next” button to proceed to the Review of Systems stage.